


The Landscape Synthetic Turf Industry has been so exciting lately with so many uses being offered than ever before. Designers, Architects, and Engineers are receiving more requests for synthetic turf to be placed on concrete, asphalt, balconies, mezzanines, and rooftops. They are finding themselves researching proper methods and systems that can be incorporated within the design of their projects to give beautification.
This month ASK JW will teach about nailer boards on concrete, asphalt, balconies and rooftops and how they incorporate with underlying drainage grids.
Before you take on a project that requires placing synthetic turf on concrete, asphalt, balconies, mezzanines, and rooftops, you may want to study up on drainage, temperature, and wind lift. Laying turf on exterior surfaces may affect the longevity of the installation.
Most of the synthetic turf today is manufactured with drainage holes that are punched into the backing to allow water and fluids to exit the backing. When these holes are blocked, flooding and buildup of contaminants may occur.
I recommend elevating the synthetic turf with a drainage grid above these surfaces for these reasons:
- The existing surface can stay as-is and does not have to be removed (most cases) – I have seen renters place turf on their balconies and removed it when their lease was up.
- Drainage – Elevating the turf above the existing surface will allow water and fluids to easily exit the area as per the existing slope. If the hardscape is sloped properly, the Airdrain may be placed directly on the hardscape without doing anything but securing the perimeter with a nailer board
- Cooler temperatures- Elevating the turf will allow air to circulate below the system assisting in a cooler surface which prevents “heat wrinkles”. When you have 92% air being allowed to circulate below the surface of your turf, it prevents excessive heat to cause wrinkling.

What Type and Size Nailer Board Should I Install?
I recommend using a 1” (inch) in thickness plastic poly/composite nailer board. Do not use wood for nailer boards – wood dries up and cracks over time. The SGW Polyboard comes in 1″ x 4″ x 20′ and can be cut down to any length to be laid FLAT when used for concrete, asphalt, balconies, mezzanines and rooftops installations. This 1” thick material works great for incorporating AirDrain. Made in the USA, SGW Polyboard is a remarkable alternative to today’s synthetic turf nailer board products. SGW Polyboard can be drilled into without splitting and cut without splintering.


Tools that will be needed to secure Polyboard laid flat to concrete, asphalt, balconies, mezzanines and rooftop surfaces?
- SGW POLYBOARD
- CHALKLINE
- DRILL & 3/8” bit
- ELECTRIC
- SUPERSEAM PRO 444
- STAPLE GUN/PLENTY OF ¼” x 1” CROWN STAPLES


*** Always do a drainage test to the area that is being proposed to view the flow and exit of water ***
1. Mark out the exterior edge of the desired area to be installed.
2. Take a chalk line and snap the exterior edge onto the surface.
3. Cut the nailer board to lengths to fit the exterior edge, with the nailer board sitting on the inside edge of the chalk line. Place the nailer board flat on the chalk line to ensure all sections are cut correctly.
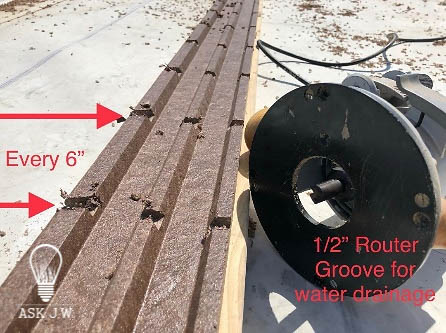
4. When all the exterior nailer boards are cut into place, cut openings for the escape of water and fluids. An electric router works fast and clean! I recommend placing channels/holes at 3” to 6” inches on center to allow water and fluids to escape out and from under the installation.
5. Prior to adhering the nailer board to the surface, I recommend drilling 3/8” holes every 12” inches on center to allow the adhesive to escape during compression. This will lock in the two surfaces for a strong bond.
You cannot drill or nail nailer board to rooftops, balconies and mezzanines surfaces. This will damage the surface and may cause the surface to leak below.
When securing the nailer board to these types of surfaces, I recommend placing Superseam Adhesives between the surface you are adhering. Superseam adhesives are the strongest in the industry and will bond to most surfaces including concrete and asphalt. Make sure the surface is clean of all dirt and debris. *Remember the system will not be completely secure until infill placement is completed, and make sure to respect wind lift in all areas.
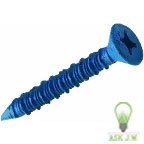 6. When securing nailer boards flat on concrete or asphalt I recommend drilling and securing with a tapered head concrete anchor. Using Superseam Adhesives along with anchors will ensure a strong bond which will assist in thermal expansion.
7. When the nailer boards are secure and in place, it is the start of the Airdrain placement.
Please read my Ask JW Airdrain Column for installation information: https://syntheticgrasswarehouse.com/askjw/what-drains-better-than-air-airdrain-does/
8. When the nailer board and Airdrain installation are complete, place the synthetic turf over the Airdrain.
9. Cut off any excess over the nailer board and leave approximately 3” inches.
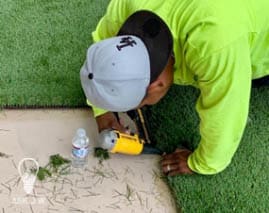 10. Overlap and tuck the turf to the outside 1” inch of the nailer board and staple every 2” inches on center. Make sure you keep the turf stretched tightly.
11. Placing infill at areas that are susceptible to “Wind-Lift” is very crucial. When synthetic turf is placed on rooftops and balconies high winds may rip them right off. I have witnessed turf resting upon vehicles from high rise installations that were improperly filled with turf infill – the weight is crucial. Don’t choose a high ounce turf either. The higher the ounce, the less infill will be placed. Less infill means the wind will remove it from its position within seconds.

For more Information on nailer boards, or if you would like to speak to JW regarding other Turf questions, please feel free to call him at (888) 846 3598 or email askjw@sgwcorp.com


