

Head Seams
I have been speaking for decades on how to create invisible seams. One type of seam that often gets overlooked is the head seam. This month, ASK JW will explain how to perfect the installation of head seams using the Superseam method.
What is a Head Seam?
In the synthetic turf world, a head seam is when two sections of synthetic turf are joined together from end to end.


In the synthetic turf world, a head seam is when two sections of synthetic turf are joined together from end to end.
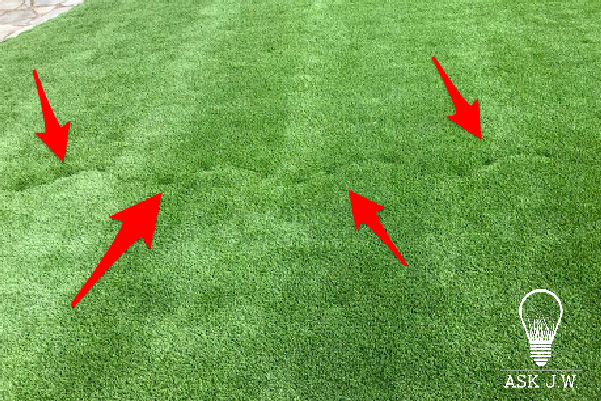
Why do head seams become visible after they are installed? Foot traffic can easily be the culprit to visible head seams. When head seams are not secure or installed correctly, foot traffic may cause the edges to flip and curl. This happens when installers use embeds (nails, staples) instead of seaming tape and adhesive. I recommend using seaming tape and adhesive for all synthetic turf seams. I recommend using an integrated seam for head seams. Straight head seams may become visible due to the dreaded “mohawk.” Using the Superseam Tool for cutting in head seams integrates the two sections invisibly.
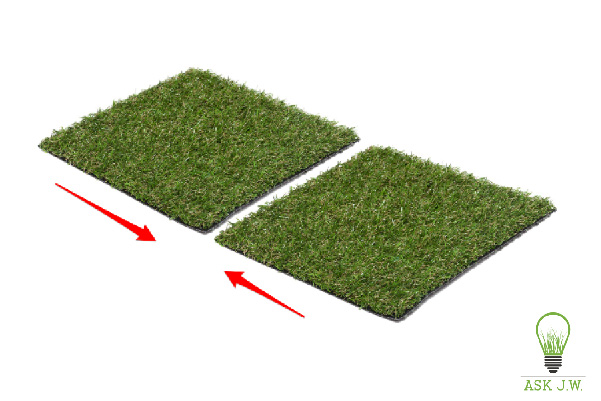
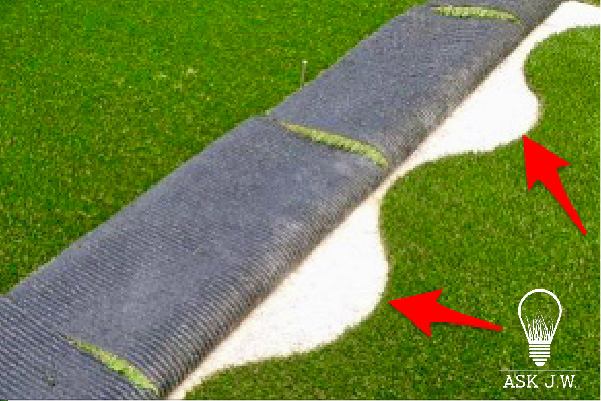
Head seams with gaps will become visible over time. It is crucial that you connect head seams tightly together without any space between the two sections.
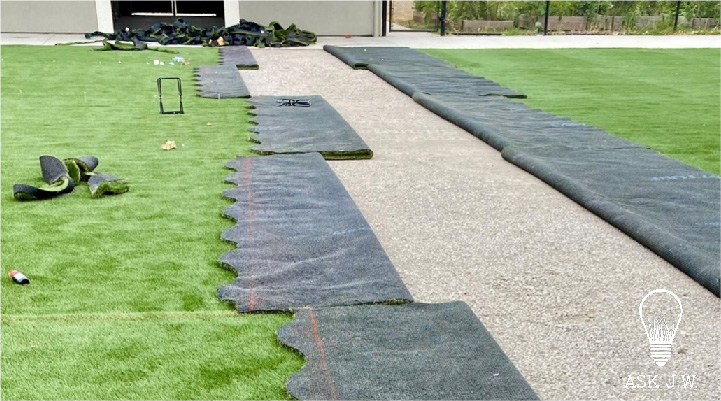
When calculating the layout of the installation, it is important to avoid head seams when you can.
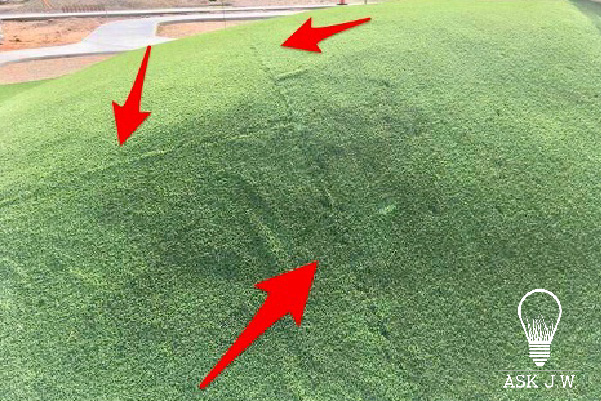
The image to the left is a very poor example of inline and head seams. Improper planning by the contractor caused this installation to be completely removed and replaced.
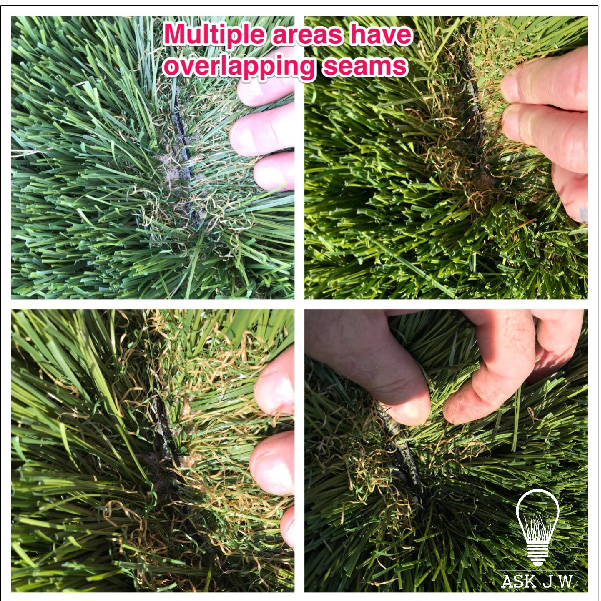
Overlapping connections of head seams will cause the seam to be visible. When you have overlapping head seams, it may cause trip hazards.
Always double-check the seamline before placing turf infill. It is much harder to repair seams when the infill is complete.


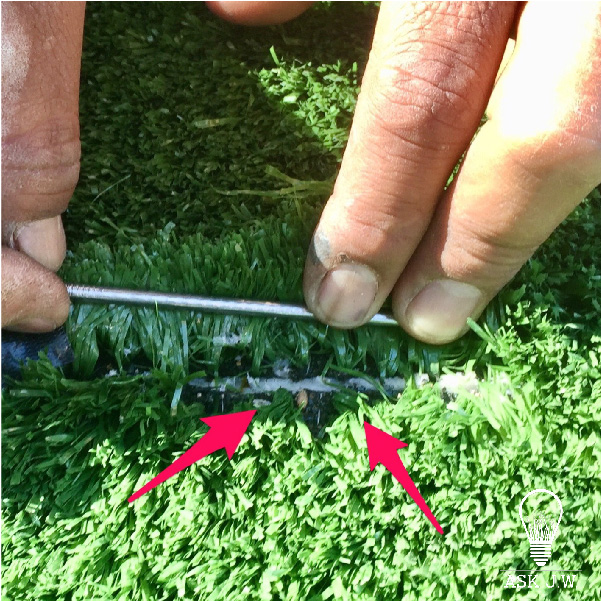
I recommend NEVER using embeds (nails, staples) when securing head seams; embeds cause pockmarks. Pockmarks are when embeds trap the turf fibers and become very noticeable, especially after infilling. Seam tape and adhesive will always prove to be the best option for creating invisible seams.
Please read my column regarding pockmarks.

When cutting into head seams, I recommend doing all you can to create invisibility. If you are new to installing head seams, I recommend taping one section to keep the fibers out of the way when cutting in section two.
Make sure you use tape that will not create a strong bond to the fibers. 
I recommend using 2” white masking tape. If duct tape is used, it may pull the fibers out and leave a sticky residue, especially during hot summer months.
Cutting in a Head Seam

In this demonstration, I will use the Superseam Tool to create a head seam. You may use a straight cut, but I recommend integrating all seams. When cutting in a head seam, it is very important to have proper alignment of the two sections to

be connected. If the head seam is cut out of square, it will be difficult to connect additional inline seams to the two sections. Before cutting the edge of section one, I recommend pulling a square and snapping a chalk line on the backing to ensure the cut is square to section two. This will allow all connecting turf to align with ease.


When section one is aligned and cut, overlap section two, approximately 12” to 18”, overlapping section one. This will give enough material for cutting relief cuts into the head seam. Make sure both sections are aligned and even at the exterior inline. When both sections are aligned, take a sharp knife, and cut relief cuts at the center of the convex part of the Superseam (the “camel hump”).
When the relief cuts at section two are complete, additional relief cuts are to be made at the concave portion of the Superseam.


Fold the edge of section two over and onto section one. Cut relief cuts at the center of the concave portion of the Superseam cut.


When the larger relief cuts are completed, I recommend making smaller relief cuts the entire length of the head seam. This will allow for more accurate integration.

Cutting smaller relief cuts makes it easier for beginners.

When the cutting process is complete, you may need to trim areas that may be overlapping.

Patience and sharp blades are a must when cutting in head seams. Remember: blades are cheaper than labor.

I recommend placing infill by hand at head seams. This will assist in creating an invisible seam. When you fill the seam by hand, it produces better control of the placement. It also prevents the forcing of infill, which may spread the seam apart.

It is crucial to brush and powerbroom ALL seams at a 35-degree angle. This will prevent any lifting of the edges.

For more information regarding head seams or would like to schedule a training or webinar, please contact J.W. at askjw@sgwcorp.com or call (888) 846-3598.
Suggestions for the use of ASK JW installation techniques are solely at the end users’ discretion; however, the user should determine suitability for the intended use by his/her own evaluation. Because the use of the materials is beyond our control, neither ASK JW nor SGW shall be liable for the outcome of any use of said materials, including any injury, loss, or damage, direct or consequential, arising out of the use or inability to use these techniques and products.


