

Over the years, hundreds of synthetic turf putting greens succumb to a “wrinkling affect” due to improper installation. The biggest cause behind these wrinkles is often due to improper infill amount along with temperature changes.
Whether you are installing texturized or slit-film (a.k.a. fibrillated) turf, it is critical to understand what it takes to “ballast” the product as well as “negative thermal expansion’s” role for a successful putting green installation.
Critical Terms to Remember
- “Ballast” is defined as a heavy material used to improve stability and maintain balance and steadiness.
- “Negative thermal expansion” is defined as the tendency of matter to change in volume in response to a change in temperature through heat transfer.
These two concepts will play a major role to a successful putting green install, wrinkles not included.
***LET’S BEGIN!***
When installing putting green materials, it is important to lay the turf roll flat for a couple of hours prior to installation so the putting green’s surface will flatten.
**Please remember: If you expose wrinkled synthetic turf to UV sunlight and other harsh environmental conditions for long periods of time, this will cause the synthetic turf to memorize its shape and therefore make these wrinkles impossible to remove.**
During installation, it must be stretched tightly and secured to flatten any wrinkles. Once the entire putting green surface is installed, it is very important to prevent heavy traffic on the fibers in order to avoid premature matting. Not only will premature matting give the ball an uneven rolling surface, it will inhibit the proper amount of infill needed to ballast the putting green.
I have personally installed hundreds of putting greens and found that the infill material’s granular size is very important for ballast. By educating your team about different infill types, sizes and placement, you will cover a crucial step towards a better putting surface. Avoid using materials like beach sand, coal slag, dirty silica, fine cementsand. A putting green surface always needs a quality infill! By utilizing the correct infill and amount, you can avoid wrinkling and give the end user a professional playing surface.
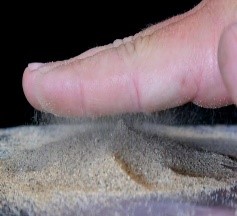
Be mindful of “static electricity” while incorporating your infill. When using a substandard infill and infill size, the installer must aggressively scrub the infill with either a push broom or fibrillating machines to work the infill below the surface. The excessive scrubbing creates static electricity and causes most infill to stick to the fibers and therefore never reaching the base of the putting green material.
SGW carries #60mesh putting green infill that will quickly drop to the base of your putting green surface. This infill will not only minimize the need to aggressively scrub, but it will also save your installers time and labor to complete the infill process.
A typical synthetic putting green averages around ½ inch in thickness and requires between two and three pounds of infill per square foot. To make sure the surface has a true ballast along with 9-12 Stimp meter rating (measurement for a putting green’s speed), I recommend three pounds of infill per square foot for your putting green.
In order to determine how much infill you will need for your installation, follow this simple formula:
Square foot of your putting green X Recommended Pounds of infill = Total amount of infill needed
For example:
1200 square foot putting green X 3 pounds of recommended infill = 3,600 pounds of infill needed for your job
SGW True Putt product is an exception to your typical putting green as it is a tournament quality putting green and features a high Stimp meter rating. This product acts much like a real bent grass and requires four to five pounds of sand per square foot.
For the SGW Nylon Putt Two-Tone, Poly Putt Two-Tone and Poly Putt Two-Tone Light, I recommend the following:
- Use SGW’s clean #60mesh Putting Green infill. Try to avoid using an infill that is dusty and powder-like.
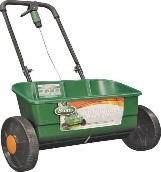
- Invest in a good drop spreader. Most supply houses carry “Scott Drop Spreaders” which cost approximately $60. A good drop spreader will allow the infill to be evenly distributed.
During the infill process, make sure pass with the drop spreader is consistently placing an equal amount of infill onto the surface.
To evenly distribute infill, spread the infill going east-to-west, then north-to-south. Repeat this until all of the calculated infill is placed and has reached the top of the surface where it is visible to the naked eye. For the top dressing, I recommend SGW’s Durafill (small) which will produce a beautiful green appearance. It will also allow a faster ball speed.
Once you have finished your final sweep, about 1/32 inch of turf should be exposed.
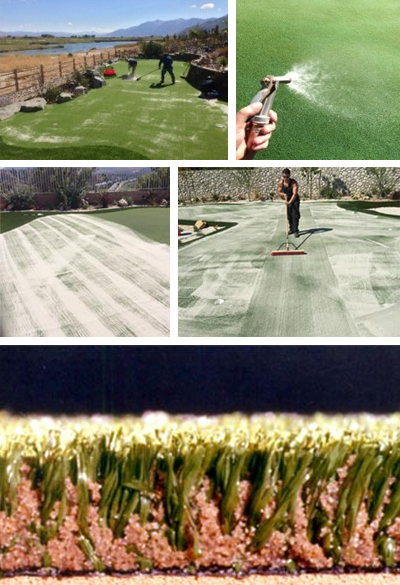
After the infill top layer in completed, use a water hose with a good nozzle and spray down the entire putting green surface. This will assist the infill to settle in place and bring out the putting green’s surface color.
Your putting greens will look amazing and last longer! Avoid these common mishaps with putting greens and install them wrinkle-free. Stay tuned for next month’s ‘Ask J.W.’ installment!
For more information, contact J.W.: askjw@sgwcorp.com or call 888.846.3598


