


Over the years, synthetic turf uses have become more popular than ever. Synthetic turf has served decades of service to sporting surfaces, landscapes, and putting greens. The latest craze? Synthetic turf rooftops. Taking advantage of areas that are on rooftops, balconies, and mezzanines is becoming more popular in the design stage. Many architects and designers are adding rooftop amenities to their portfolio and creating areas on upper levels of buildings for everyone to enjoy.

Who would have ever thought that you could have a yard on top of your roof? Well, now you can! Placing synthetic turf on rooftops, balconies, and mezzanines has become the new trend. Having an area overlooking the city or vast neighborhoods can create a space of peace and relaxation. It can also be a place to kick back, lay down, and chill with friends or play games such as cornhole. Additionally, if you’re lucky, your rooftop will have views that are breathtaking.
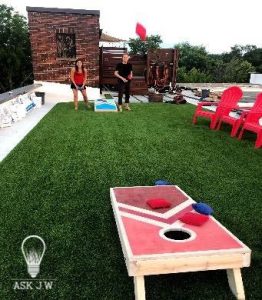
This month I am going to share an installation journey that I had with a homeowner and new friend named Aaron. He and his wife found me online through my ASK JW columns and wanted help building a yard on top of their building. Not knowing if he had any experience, I offered help in any way I could. I taught him the entire installation process through images, videos, and FaceTime. He was attentive, eager, and active during the entire process. I hope you enjoy this month’s install with Aaron. Not only did he and his wife complete the entire project by themselves, but he was a perfect example of how listening and hard work always pay off. Remember, every installation is different than the next, so these installation techniques may differ to what you’ll need for yours. If you need help, I am here. Give me a shout! JW

The first thing I asked Aaron was whether the roof structure was stable. Buildings are built as they are designed. Can your rooftop, balcony, or mezzanine withstand the extra weight? The turf you choose is crucial to the amount of weight you will be adding to the existing roof. Some synthetic turf products for rooftop designs require up to 5 pounds per sq. ft of infill for ballast/wind-lift. In Aaron’s case, his rooftop could withstand the extra weight.

The second important factor is drainage. Will the water drain beneath the synthetic turf to an exit? Even though the system I recommend will sit above the roof’s surface, it isn’t good for any water to be left sitting still, especially under the turf area. I have seen algae and larva take up big puddles of water on top of thermoplastic polyolefin (TPO).
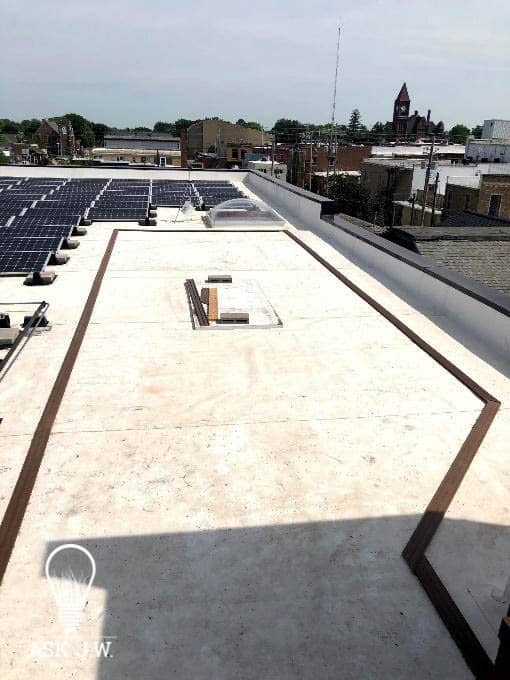
TPO single-ply roofing is among the fastest growing commercial roofing products. Most residential and commercial roofs are being constructed with TPO when tile or shake roofing materials are not specified. TPO allows 100% protection of water penetration and offers an inexpensive way of completing a roof system. Even though TPO is a great roofing solution, its white, flat surface is not a pretty sight, especially when viewing from above. Rooftops and balconies that are constructed with a TPO membrane give the client the option to use synthetic turf rather than standard tile, coatings or outdoor carpet.
***It is crucial to the roof’s integrity to water test the area of installation***


Some rooftop installations may need a transition edge. Once the rooftop installation is complete, there will be a difference in elevation. The completed elevation shouldn’t be more than 2 inches.
If this is a commercial rooftop installation, you will need to abide by all A.D.A. requirements.
Lay-Out
Prior to the installation of any materials, you will need to place a reference line for the exterior nailer board. The nailer board will contain the rooftop system and secure the turf as well.

Once you have located the area and made the exterior measurements, snap a chalk-line on all reference marks. This will be the line on which you will place the nailerboard, so make sure all of your measurements are true and square so that you don’t have issues with being “out of square” with the turf layout.
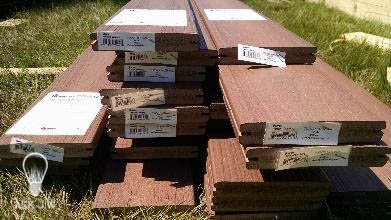
Once all the measurements are established, marked, and chalk-line snapped, it is time to install the exterior nailer board. I recommend using SGW 1”x4” plastic composite board as the exterior nailer board. Landscape border materials can also be used if they are 1”x 4”. This will allow future steps in installing the AirDrain grid. The AirDrain and nailer board need to be as close to level as possible. If you cannot find a 1” plastic composite board in your area, you can use Trex Wood (plastic composite decking materials) like Aaron did. He couldn’t find a true 1”x4” landscape material, so he used Trex Wood. Trex Wood works really well due to its one-sided channel which allows excess water to escape under heavy rainfall. It also prevents rainwater from being trapped between the parapet wall and the turf installation. Trex Wood is very true in straightness. You may find these at your nearest hardware store.

***KEEP ALL LAY-OUT OF NAILER BOARD CORNERS SQUARE – OTHERWISE YOU WILL NEED TO CUT AND TRIM AIRDRAIN SECTIONS***
Nailer Board Installation


Aaron cut the Trex Wood edge vertically so that it would have a stable edge for stapling the turf’s exterior edges.
Cut the nailer board to the correct length to fit the exterior edge, with the nailer board sitting on the inside edge of the chalk line. Once all the sections are cut, place the nailer boards flat on the inside of the chalk line to ensure all sections are cut correctly.
Prior to installing the nailer board, you will need to create openings for the escape of water and fluids.
The nailer board contains the turf system. This means that the water that flows in and around the turf must effectively flow to the drainage exit.
If you have a landscape plastic composite nailer board, you will need to leave gaps or openings to allow the water to escape.
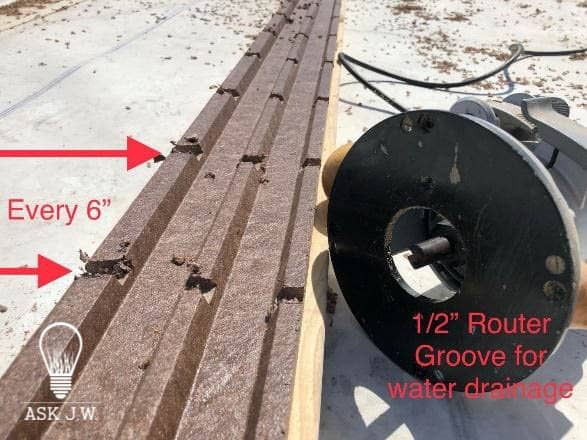
An electric router works fast and clean!
I recommend placing slots, channels, or holes at all areas that water flows through and exits, or place them every three to six inches on center to ensure all fluids exit from under the installation.

A minimum of 3/8” holes should be drilled into the nailer board to allow for the air to escape during the compression step. If you don’t allow the air to escape, the bond will be weakened.
Aaron went the extra mile and constructed a “biscuit” connection at all corners for stability. This prevents the corners from separating and lifting during high winds or extreme heat.
Great job, Aaron!


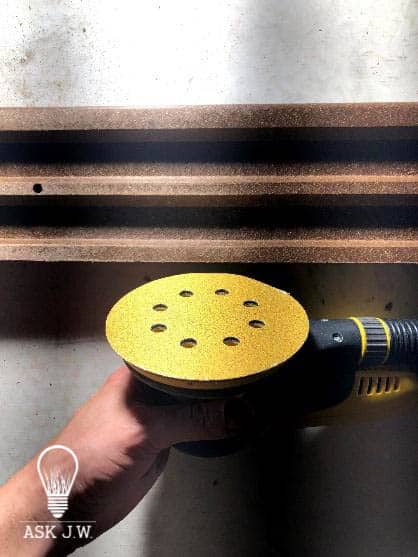
Prior to adhering the nailer board, I recommend lightly sanding the nailer board surface as well as the area that the nailer board will be adhered to. This will remove all excess residue from drilling and cutting to make for a strong bond.
Securing Nailerboards
You cannot drill or nail nailer board to rooftops, balconies, or mezzanines surfaces. This will damage the surface and may cause the surface to leak!
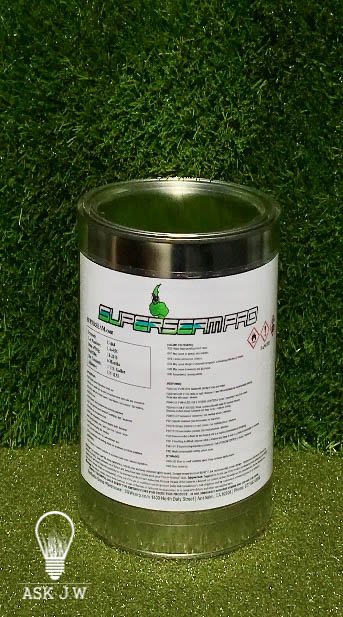
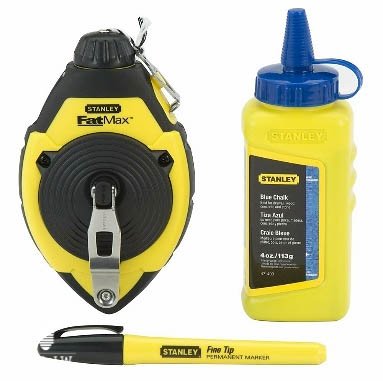
When securing nailer boards to rooftop surfaces, I recommend using SGW Superseam Pro 444 Adhesive. Superseam Pro 444 Adhesives are moisture-cured urethanes made up of a blend of the strongest polyurethanes/prepolymer. Superseam Adhesives work by means of chemical and mechanical bond rather than just a mechanical bond. They chemically “attach” themselves to the surface as well as “grabbing” and “locking” onto the substrate.
Superseam Adhesives’ mechanical properties include elongation, compressibility, tensile strength, elasticity, tear resistance, and fatigue resistance. Superseam Adhesives can withstand the harshest weather conditions with great longevity, especially on rooftops.
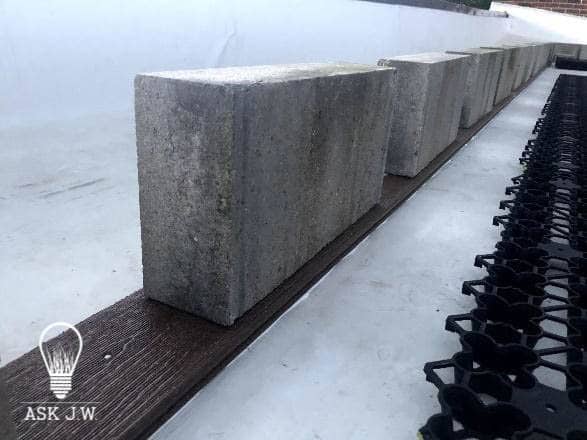
*Remember, the system will not be completely secure until infill placement is completed, and make sure to respect wind lift in all areas.
Place ¼ inch of SGW Superseam Pro 444 Adhesive at the entire perimeter surface where the nailerboard will lay flat.
IMPORTANT!!!
Compress the nailerboard with even weight throughout. Allow to cure.
Great job on the compression, Aaron!
Placement of AirDrain
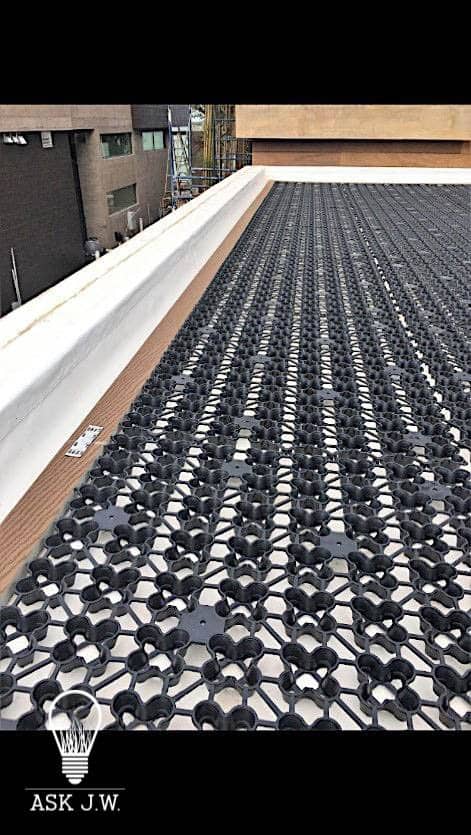
Synthetic turf on rooftops and balconies must have proper drainage. I strongly recommend placing a drainage grid below the balcony or rooftop application so water can run through the synthetic turf and allow water to escape. Without a drainage grid, the longevity of the synthetic turf will be depleted due to thermal contraction and the buildup of contaminants.
Ask JW – FYI

AirDrain Geocell has patented expansion and contraction connectors built into it, and it can add valuable LEED points to any green roofing project. It has a unique and extremely easy-to-install assembly design as well as 100% post-manufactured recycled content. It’s incredibly lightweight at only 3.1 pounds per 7 square feet, with a rating 33,552 psf. AirDrain is the ideal drainage medium for green rooftop applications, whether decorative or in constant use.
Move water rapidly or capture it for retention with AirDrain’s 92% air void and 400 drainage notches. AirDrain can hold 0.576 gallons of water per square foot if needed until it can evacuate from the roof to the perimeter exit drains. That’s a holding capacity equal to approximately 6 inches of compacted gravel.
- AirDrain is a low-cost, easy-to-install Geocell drainage grid that creates a 1-inch, 92% air void underneath your artificial turf.
- AirDrain elevates the synthetic turf above the subgrade to allow air to circulate and water to pass through rapidly.
- AirDrain helps keep the surface temperature at lower levels due to its ability to allow the continuous movement of air.
- AirDrain is made from 100% recycled copolymer, which has the impact modifier “metallocene” added to it for qualification as a no-break plastic. This means that it’s able to withstand extreme heat and cold while still maintaining its performance.

One AirDrain pallet covers approximately 798 square feet. One pallet fits in an elevator for easy transportation to the roof.
Proper Sequencing and Orientation of Panels for Rapid Installation
*All installations must start in the top left corner of the field and work left to right to be installed properly*

Orientate the AirDrain GeoCell materials with the integral indicator tab toward the panel’s bottom left corner (painted yellow). Install the AirDrain units by placing units with the connectors and platforms face-up, creating a flat surface for the profile above. If the male connectors do not fall or drop into the female connectors, then the orientation is incorrect.
I recommend placing the sections where the AirDrain tabs extend over and on top of the nailer board.


AIRDRAIN GRID IS 32”x32” SQUARE
AIRDRAIN GRID IS 7 SQ. FT. PER GRID
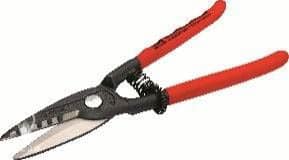 I recommend using “tin snips” to easily cut the AirDrain into place. Always use eye safety when cutting.
Aaron wasn’t worried about O.S.H.A. when wearing his favorite sandals. Go Aaron!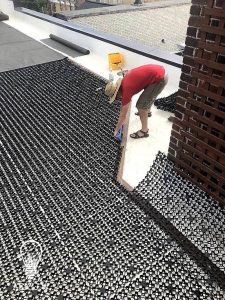


When the AirDrain is put together and cut into place, I recommend stapling the AirDrain tabs that extended over and on top of the nailer board. I recommend using a crown stapler with 1/4” crown by 3/4” tall. Make sure you adjust the air so that you don’t damage the tabs.

OPTIONAL – Filter fabric can be placed to filter contaminants.
I DO NOT RECOMMEND USING FILTER FABRIC IF YOU ARE ALLOWING PETS TO USE THE AREA.
Placement of Turf

Allowing the synthetic turf to settle and conform is an industry standard, but I strongly recommend getting the turf placed, stretched, and secured as soon as you can. I have been on rooftop installations where high winds came out of nowhere and the turf started to blow off of the roof. Getting the turf down and secured is crucial.
Reminder… Stretch, trim, staple, and ballast ASAP.

I recommend using infill bags to secure while stretching.
Stretch, trim, staple, and ballast ASAP.
Great job Aaron on getting it all stretched smoothly!

When cutting the exterior turf edge, I recommend using a push cutter. This tool allows you to cut excess waste off the perimeter with accuracy. The push cutter blade cuts from the bottom of the turf (the backing) without cutting the top fibers. Cut approximately 6” outside the nailer board line. This will allow you to have enough turf to work with when you precisely cut it to fit nailer board edge.
Stretch, trim, staple, and ballast ASAP.


I recommend using sharp contractor scissors to complete the final trimming of the turf edge. The finish edge should be cut precisely and fold over tightly to the outer edge of the nailer board.
I recommend using SGW Superseam Pro 444 Adhesive on the nailer board (under the turf backing) prior to stapling. This will ensure a bond that helps prevent the edge from pulling up or being affected by wind-lift.
Placement of Infill (Ballast)


Placing infill at areas that are susceptible to wind-lift is very crucial. When synthetic turf is placed on rooftops, balconies, and mezzanines, high winds may rip them right off. I have witnessed turf strewn on vehicles below from high-rise installations that were improperly secured and infilled. Ballast is crucial. I recommend NOT placing synthetic turf that is high in ounce unless the gauges will allow enough infill to ballast to prevent wind-lift. The higher the ounce, the less infill will be placed. Less infill means that the wind will remove it from its position within seconds. Call me if you want to hear some horror stories.
As you can see, Aaron loved the feel of his new yard through his sandals while placing the infill.


Great job, Aaron!
THANK YOU FOR FOLLOWING “ASK JW”


For more information regarding Rooftops, Balconies, and Mezzanines please contact J.W. at 888.846.3598 or email AskJW@SGWcorp.com


