

It amazes me how many synthetic turf contractors do not use Radius Points when they install putting greens. Smooth rolling of the golf ball seems to be the only concern to the frontline. If you want to be successful at installing putting greens, you must understand putting greens. You must understand how the smooth contouring putting surface goes hand in hand with its exterior outline… “Roundness without sharpness.”
Take pride in your work, take the time and do some personal research. Contractors ask me how they can learn to be better at installing putting greens…. “I say grab a putter and learn what it takes to become better at putting greens.”
Ask JW
Radius, Circumference, and Diameter

Radius, Circumference, and Diameter are important words to know and understand when installing a putting green. You hardly ever see putting greens that have sharp, square or pointed designs. Most radius lines are designed around the placement of the putting green cups. When these terms are put to use, your projects will always come out looking beautiful.
Location of Putting Green
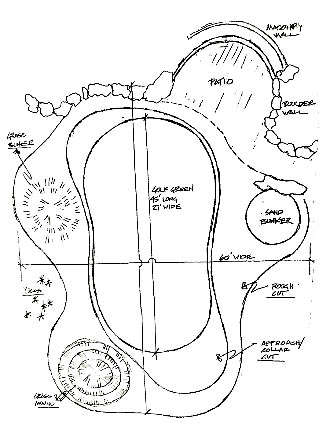
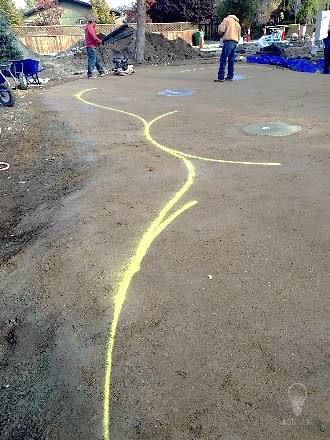
It is best to have a schematic or a sketch of the proposed putting green and its location. This will allow for the installation process to be more efficient especially when it comes to the hole/cup placement. When the location is established, I recommend marking the furthest points at the exterior edge of the entire putting green, including fringe. This will create boundaries when establishing the putting green surface, fringe or desired synthetic turf collar.
When the outside boundary lines are established, paint out a rough outline to where the entire putting green will fit, including fringe, collars, sand traps, grass traps, etc.
Locate, mark and install the putting green cups.

Depending on the design of the entire putting green, many radius points may be needed to accomplish your design.
When the dirt work is complete and the putting green cups are installed, it is time to perfect the outlines and radius points for the installation of the putting green materials.
Let’s Begin***
Tools That Will Be Needed to Create a Smooth Radius
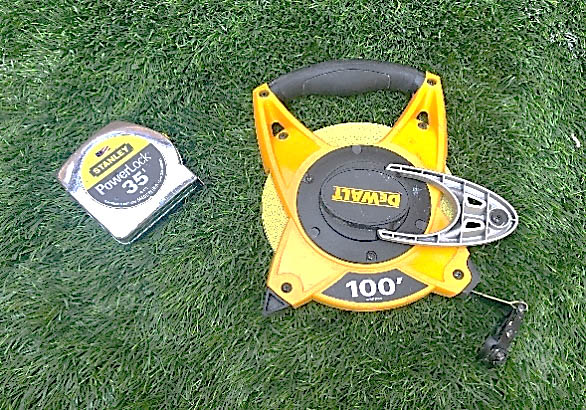
Flexible Tape Measure – Having a tape measure that is made of nylon and flexible will allow you to grab and hold tight while you mark your radius lines.
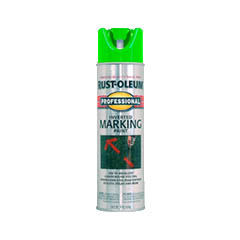
Upside down marking paint – When marking layout and exterior edge of putting greens it is advantageous to carry upside down marking paint. I prefer dark green just in case you drop the can or get overspray on the synthetic turf.
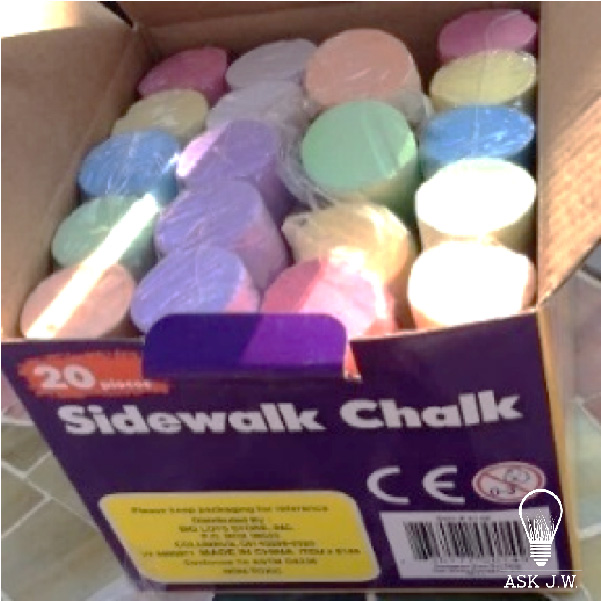
Sidewalk Chalk – I recommend using sidewalk chalk when marking the radius of putting greens. After you mark the putting green, take a push cutter(pile/loop cutter) and cut on the inside of the chalk line. It rubs off easy after installation.
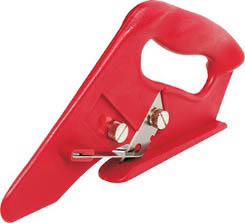
Push cutter – The push cutter is one of the most important tools that should be in your tool bag. The push cutter blade cuts from the bottom of the turf (the backing) without cutting the top fibers. The push cutter is great for cutting radius circles for exterior Putting Green lines and Tree Wells.
It also works great for cutting sections to be placed on your project, snap a chalk line first then follow with the push cutter. This will also eliminate mistakes by cutting too much turf off the roll. This tool allows you to cut excess waste off the perimeter of the turf with speed and accuracy. Make sure you change out the blade every 30’ feet for fast smooth cutting
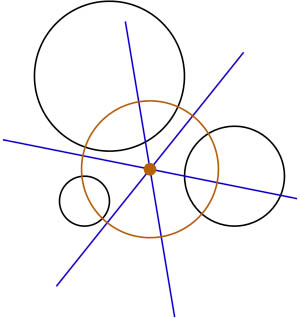
Establishing Radius Points


When you plot a circle, you must start with a “Center Point”. Once you have your center point established you can mark the desired length.
Radius Lay Out Prior to Placement of Putting Green Material

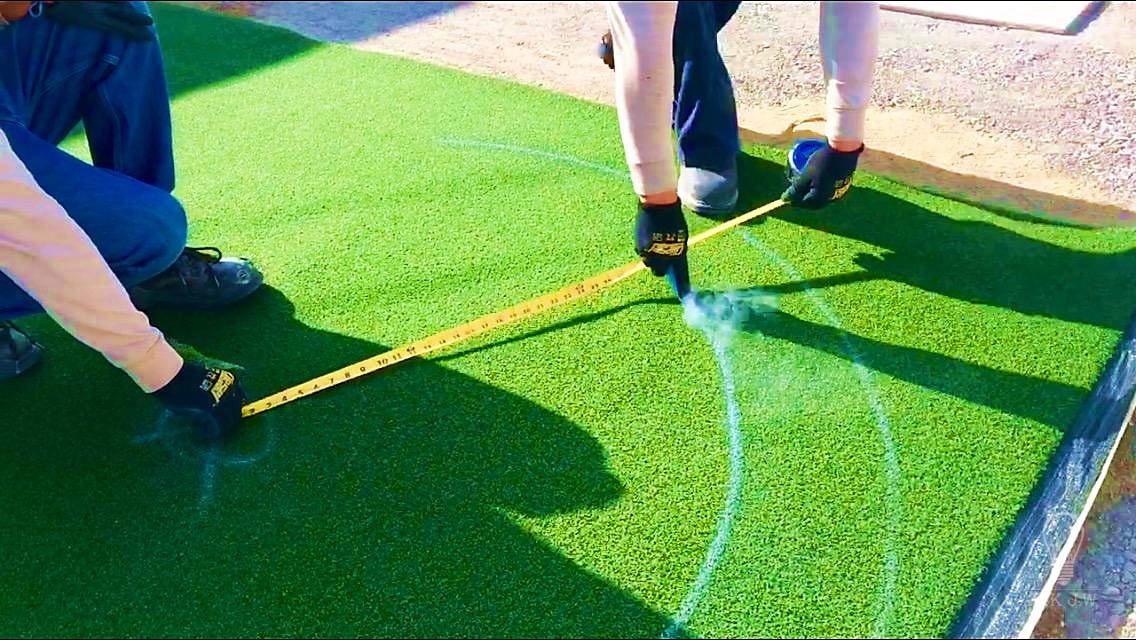
I recommend pulling measurements from the center of the putting cup. You can create any size of outside radius lines by using the putting cup as your starting point and radius reference.
Pull the desired length tightly and paint the ground as you walk slowly marking the radius point.
If this is your first time marking radius points for a synthetic turf putting green, I recommend painting complete circles so that you may get a general idea of how the painted radius lines match the design that was created.
Creating radius lines from the cup locations will allow you to connect the marked radius lines from all of the cups radius points to complete the outside dimensions of the putting green. This will allow smoothness in your design.
After the radius marks are painted, connect each radius to your exterior design. This will ensure that all of your outside radius will be true and smooth without any sharp angles.
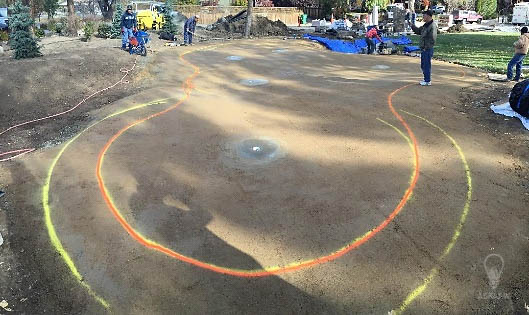
I recommend using multiple paint colors for putting green, fringe, rough collar and exterior landscape turf. This will help your installation team to visualize the install.
Exterior Lay Out & Cutting of Putting Green
!!! DO NOT USE PAINT ON THIS NEXT STEP !!!
When the putting green material is laid on the surface, repeat the steps of marking out the radius points on the surface of the putting green. I recommend using children’s sidewalk chalk, it is easy to brush out after your markings are complete.
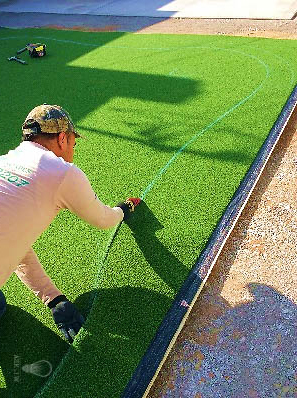
When the entire radius and perimeter is marked, cut along the chalked line with the push cutter tool.

Understanding how to create smooth radius curves in your synthetic turf putting greens will ensure success.
For more information regarding Radius & Putting Greens, please contact J.W at 888.846.3598 or email AskJW@SGWcorp.com


